Key Takeaways
- A real-world approach to virtual learning spaces brings similar constraints on the types of teaching and learning possible in the virtual spaces.
- An alternative approach is to develop virtual learning spaces for specific instructional needs.
- This alternative approach allows course objectives and learning tasks to drive the learning space development, escaping the limitations of an existing space.
User-created virtual worlds, such as Second Life, are a hot topic in higher education.1 Thousands of educators are currently exploring and using Second Life, and hundreds of colleges and universities have purchased and developed their own private islands in Second Life,2 including the University of Kansas Medical Center (KUMC).
One approach to developing a virtual world educational island is similar to a traditional approach to developing real-world learning spaces: Areas are developed to support broadly defined educational activities. These virtual areas typically include a large lecture hall or auditorium for presentations, smaller classrooms for discussion, a sandbox for student building, and an exhibition hall for displaying student work.3 However, this real-world approach to virtual world learning space brings with it similar constraints on the types of teaching and learning that can happen in those spaces. For example, large lecture halls, whether in the real world or the virtual world, are based on objectivist transmissive teaching; once built, such spaces do little to support more collaborative and constructivist learning approaches.4
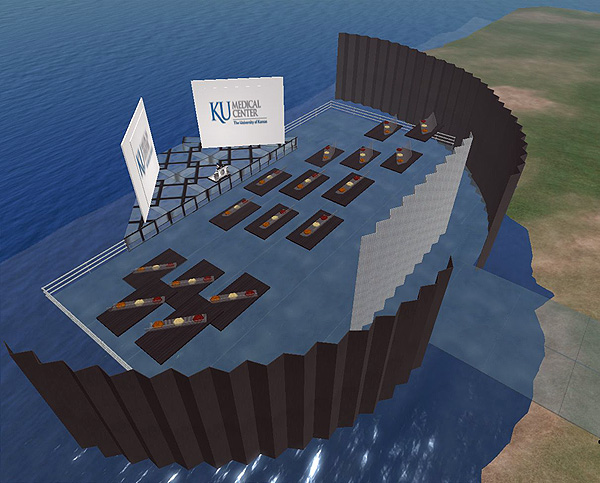
Because it is so easy and inexpensive to develop and modify user-created virtual worlds, especially when compared to the real world, we suggest an alternative approach to developing virtual world learning spaces. Instead of anticipating possible educational needs and trying to develop flexible learning spaces for those possible needs, virtual world learning spaces can be developed for very specific instructional needs. Although KUMC Isle, our private island in Second Life, does have a few familiar learning spaces — an auditorium, a sandbox, and a beach area — the majority of our island is devoted to specific course projects: a home to practice assessing and remediating disability issues, a community living center as the context for database development, and an operating room simulation for learning complex medical procedures.
In this article, we provide an in-depth examination of the design, development, and use of one of these virtual world learning spaces, our Nurse Anesthesia operating room simulation for learning the basic induction process. We also briefly describe the learning spaces we developed for several other projects. Our goal is to provide you with some insights into developing virtual world learning spaces and highlight the advantages of those virtual world spaces over real world spaces. Most importantly, we want to encourage you to target your virtual world development efforts on specific learning spaces for specific project needs. In this way, course objectives and learning tasks can truly drive the learning space development, rather than having to adjust objectives and tasks to the limitations of an existing learning space.
Project Context
- University of Kansas Medical Center, School of Allied Health, Nurse Anesthesia Education
- Information Resources
- Teaching & Learning Technologies
- Second Life

The University of Kansas Medical Center (KUMC) is located in Kansas City, Kansas. KUMC includes three schools: Medicine, Nursing, and Allied Health. Within the KUMC School of Allied Health is the Nurse Anesthesia (NURA) department, which is the academic sponsor of this project. The technical sponsor of this project is the Teaching & Learning Technologies Department within KUMC’s Information Resources Division.
Audio & Transcript: About KUMC and This Project
The University of Kansas Medical Center is organized into three major schools: Allied Health, Nursing, and Medicine. Eight academic departments comprise the KUMC School of Allied Health, including the Nurse Anesthesia [NURA] department, which is the academic sponsor of this project.
The KUMC Master’s of Science in Nurse Anesthesia is an intensive 36-month program which prepares Registered Nurses for the field of nurse anesthesia practice. This program includes both academic and clinical components.
The technical sponsor of this project is the Teaching & Learning Technologies department (TLT), within the KUMC Information Resources division. TLT’s mission is to provide leadership and support for the successful integration of new and existing educational technologies into KUMC learning environments. One of these technologies is Second Life, which KUMC uses for communication, presentations, and learning activities.
Second Life Technical Capabilities
- Avatar
- Movement and animation
- Social networking
- Multimedia
- Building and scripting
- Land and economy
The technical capabilities of Second Life are well documented on the web and beyond the focus and scope of this article. For additional information about Second Life’s technical capabilities, please visit the supplemental links included above.
Audio & Transcript: Technical Capabilities of Second Life
You are missing some Flash content that should appear here! Perhaps your browser cannot display it, or maybe it did not initialize correctly.
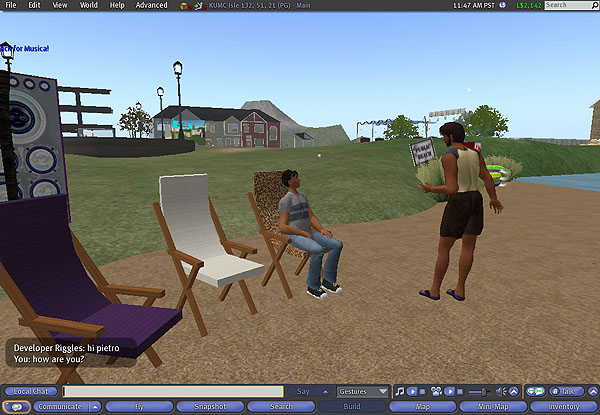
A short description of the technical capabilities of Second Life is probably in order for those people who are not yet familiar with Second Life. You interact with the Second Life virtual world through your avatar, which is your physical representation in the virtual world. You can customize your avatar’s appearance however you want him, her, or it to look. Your avatar can move: walking, running, flying, and even quickly teleporting to remote locations. Additionally, you can use animations to jump, laugh, and dance.
Second Life includes a number of communication and social networking tools: text and voice chats, instant messaging, calling cards to easily connect with your friends, as well as groups to join and events to attend. You can import images and sounds into Second Life, and you can stream audio and video into Second Life.
Of the various technical capabilities, the ability for any user to build objects and script those objects for action is the distinguishing factor which separates Second Life and a few additional user-created virtual worlds, like There and ActiveWorlds, from the other virtual worlds and games. In Second Life, you can build a complex object, like a motorcycle, and program that object to respond to other people, objects, and the virtual world itself. You can design and build your own motorcycle and then ride it or race it against others. This ability to create your own simulated world and interact with it offers some exciting new educational possibilities.
In Second Life, you can also own your own land. KUMC, like many colleges and universities, has their own private island, which provides privacy and security for their educational activities. Finally, Second Life has an internal economy based on Linden dollars, which can be purchased or sold with real money, and you can buy or sell objects, land, and services. For additional information about Second Life’s technical capabilities, please visit the supplemental links included on this page of our article.
Second Life Educational Possibilities
- Study virtual world technology itself
- Communication medium
- In-world learning activities
TLT has identified three major educational uses of Second Life. For courses dealing with gaming, online communities, and emerging technologies, students can study the Second Life technology itself. Other faculty use Second Life as a communication medium, focusing on delivering in-world lectures, making presentations, and conducting discussions. Finally, faculty can use Second Life as a learning space for in-world learning activities, such as role playing, interactive simulations, and educational games.
See David M. Antonacci and Nellie Modaress,
"Envisioning the Educational Possibilities of User-Created Virtual Worlds,"
AACE Journal, vol. 16, no. 2 (2008), pp. 115–126.
Audio & Transcript: Educational Possibilities of User-Created Virtual Worlds
You are missing some Flash content that should appear here! Perhaps your browser cannot display it, or maybe it did not initialize correctly.
The Teaching & Learning Technologies department (TLT) has been exploring and researching the educational possibilities of user-created virtual worlds, like Second Life, for several years. They have identified three major ways Second Life is used for teaching and learning. Some faculty include Second Life in courses dealing with gaming, online communities, and emerging technologies. In these courses, students study Second Life itself. This was the first way the University of Kansas Medical Center (KUMC) used Second Life. Their Nurse Informatics students first learned about virtual worlds, and then their students went into Second Life for a first-hand experience. They used a scavenger hunt assignment to have students visit education- and health-related areas to see what others were doing with Second Life and reflect on how Second Life could be used for nurse education.
Other faculty use Second Life as a communication medium. They’re interested in in-world lectures and presentations, online discussions, student-built displays instead of traditional reports, and machinima, which is real-world filmmaking from the virtual world engine. This was also an early use of Second Life by KUMC. Their Nurse Informatics students made in-world poster presentations on class research topics, instead of writing traditional term papers. This activity is described in more detail in another section of this article titled, KUMC and Second Life Learning Spaces.
However, TLT is most interested in using Second Life as a learning space for in-world learning activities. To help organize those learning activities, Dave Antonacci and Nellie Modaress developed the Interaction Combinations Integration model (ICI). In this model, the virtual world — much like the real world — consists of people and objects, and those two things can interact in three possible combinations: person-person, person-object, and object-object. Much of what is taught in real life can also be classified into those three interaction combinations.
Once a course topic has been categorized within the ICI framework, a variety of virtual world learning strategies and techniques can be applied to learning that type of content. Within the ICI framework, the Nurse Anesthesia operating room simulation would involve person-object interaction because it teaches people how to interact with objects. Simulation can be an effective instructional method for teaching person-object interaction.
KUMC and Second Life Learning Spaces
- Research began in 2004
- KUMC Isle
- Projects
- Tours and scavenger hunts
- Student poster presentations
- Jayhawk Community Living Center
- Home assessment
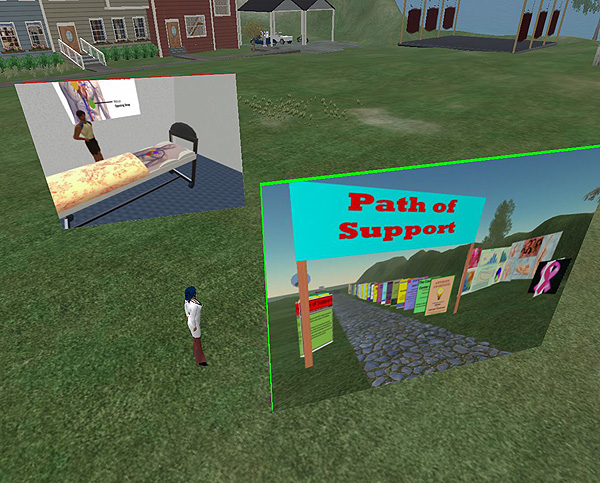
A Scavenger Hunt in Second Life
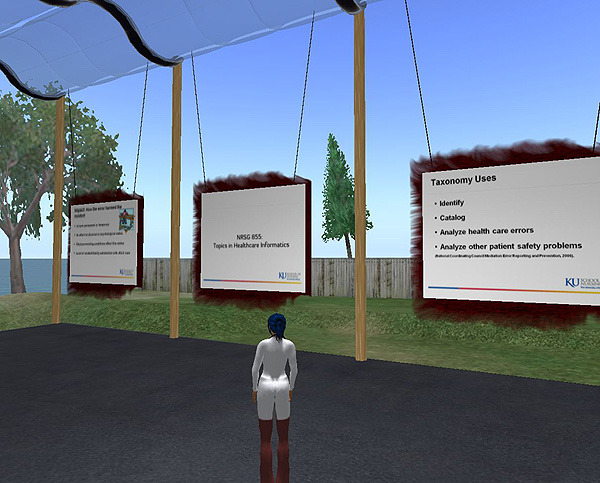
Student Poster Presentations
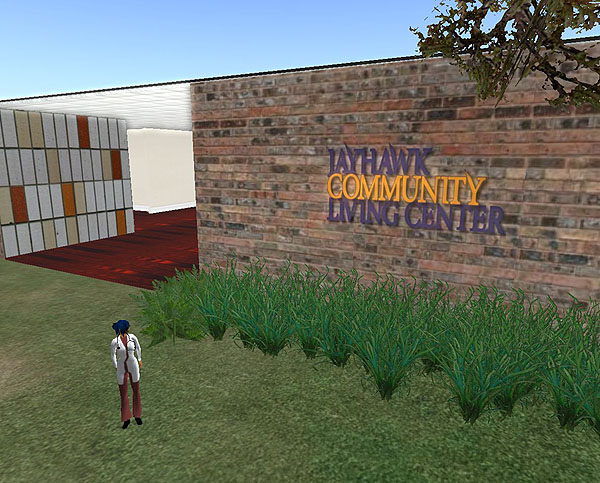
Jayhawk Community Living Center
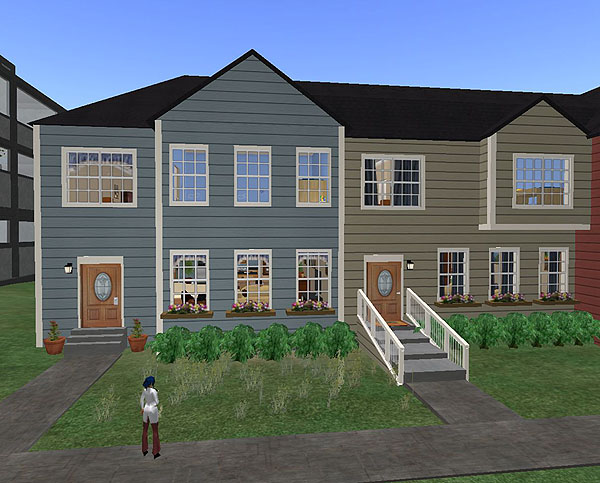
Home Assessment Project
KUMC began exploring Second Life in 2004. One of their first projects was an in-world student poster session for their Nurse Informatics program. Instead of traditional research papers or classroom presentations, these students made their presentations within Second Life, and they invited faculty and students from around the world to join them.
This project illustrates two important advantages of virtual world learning spaces over physical spaces:
- The virtual spaces are tremendously more flexible, allowing learning spaces to be placed, modified, expanded, and moved as needed.
- Virtual world learning spaces can be accessed by others at any time without real-life risks such as theft or vandalism.
To support this project and the Nurse Anesthesia simulation, KUMC purchased a private Second Life island, so they would have a secure virtual space for their faculty and students. It is recommended that interested colleges and universities purchase their own private islands for privacy and security reasons. Educational discounts are available.
In-world Video of KUMC Isle and KUMC Projects
Video Transcript: KUMC Isle and KUMC Projects
The Teaching & Learning Technologies (TLT) department began exploring and researching the Second Life virtual world in 2004, just after it was released from beta. Struck by the educational potential of this new learning space but also challenged as to communicating these possibilities to faculty, they began developing the Interaction Combinations Integration (ICI) model to help educators connect real-life course topics with virtual world learning activities. By February 2005, they had presented their ICI model first to the University of Kansas Medical Center (KUMC) faculty and then at the EDUCAUSE Southwest Regional Conference in Austin, Texas.
Later that year, KUMC’s Nurse Informatics program also began exploring Second Life. Initially, they toured education- and health-related areas in Second Life. Their first project was an in-world student poster session where students presented their class research projects, instead of a more traditional paper or classroom presentation. This project illustrates several advantages of virtual world learning spaces over traditional classroom spaces. First, virtual world space is tremendously more flexible. Once built, the student presentation area could be placed anywhere on the island and at any time it was needed, with little effort. It could be easily expanded by simply copying the original area, and it could be quickly removed when not needed to free the island space for other projects. Second, faculty and students from around the world could be invited to join student presenters without incurring travel time and expense, and the student displays could remain available for viewing after the presentation event without physical-world security risks, such as theft and vandalism.
Because of the Nurse Informatics and Nurse Anesthesia projects, KUMC decided to purchase their own private Second Life island in 2007. With this island, they have approximately 16 acres of virtual space for their projects. Developing learning spaces in public areas, even in privately owned areas on the main grid, can introduce risks, such as griefers who may disrupt in-world events or build inappropriate and objectionable content on adjacent land. Colleges and universities considering virtual world learning spaces should invest in their own private island to ensure privacy and security. Educational organizations receive a significant discount on educational islands from Linden Lab, the company behind Second Life.
Another Second Life project on KUMC Isle is their virtual Jayhawk Community Living Center, which Nurse Informatics uses to provide an authentic healthcare setting from which their students develop a relational database. Previously, students read about a living center and developed their databases from that description. However, with Second Life, students explored the living center building, looking for visual cues about what information might be needed for their databases, such as patient charts. Additionally, one of the instructors posed as the living center’s director and was available for questions, much like a real-life database developer would meet with a potential client. The instructors reported that this year’s databases, which used the Jayhawk Community Living Center, were the best they had received in twenty years of teaching this course.
KUMC’s Occupational Therapy and Physical Therapy departments also have a virtual home, seeded with physical disability problems and used by their students to practice home assessments. In past years, these students would practice home assessments on their own home or apartment. Unfortunately, these settings often only included a few common problems, and because the instructors were not able to visit each student’s home, instructors were not able to evaluate student work and provide constructive feedback about what students might have missed. With the virtual world home, students are presented with a complex home to assess, and instructors know exactly what disability problems exist and should be identified by students. Faculty and student feedback on the effectiveness of this project has also been very positive
These two projects illustrate another great advantage of virtual learning spaces over physical spaces. Neither of these two buildings would be financially possible in the real world, but each was built in less than one week and has been quickly modified as new needs arise.
How It Started
- Faculty meeting about interactivity
- Faculty awareness of virtual simulations
- TLT awareness of Second Life
- Second Life demonstration
- Faculty dissatisfaction with SimMan
- Initial project spark
- Refined realistic project scope
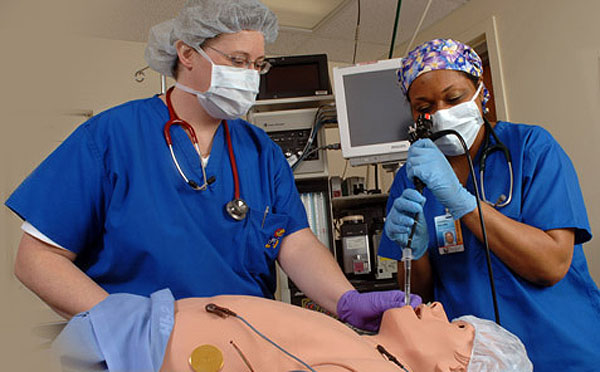
Nurse Anesthesia faculty were already experienced with physical patient simulators, such as SimMan, and they were interested in virtual simulations as well. After TLT demonstrated the Second Life virtual world to Nurse Anesthesia faculty, the two groups discussed the educational possibilities and debated a realist project scope. Ultimately, the two departments decided to develop a virtual world operating room simulation to assist first-year Nurse Anesthesia students with learning the basic induction procedure.
Audio & Transcript: How the Nurse Anesthesia Project Started
You are missing some Flash content that should appear here! Perhaps your browser cannot display it, or maybe it did not initialize correctly.
This project began with a meeting between the Teaching & Learning Technologies department (TLT) and Nurse Anesthesia about adding interactivity into their curriculum. At the time, the Nurse Anesthesia department had been teaching online for more than ten years, and they wanted to move their online courses “to the next level,” quoting their department chair. They were especially interested in virtual simulations, since a large amount of their program trains students in different processes and procedures. TLT had been exploring the Second Life virtual world for several years prior to this meeting, and they were looking for a novel virtual world educational project that would demonstrate the educational potential of this new learning space.
After TLT demonstrated Second Life to the Nurse Anesthesia faculty, the initial idea sparked for a project within Second Life. Nurse Anesthesia had been using SimMan, a computerized mannequin-like simulator, to teach many procedures and skills, but faculty weren’t completely satisfied with the SimMan because it was expensive to purchase and support, plus class time limited students’ use of the SimMan simulator. After some debate about educational possibilities versus a realistic project scope, the two departments began working on a virtual world operating room simulation to assist first-year Nurse Anesthesia students with learning the basic induction procedure.
Project Objectives
- Students learn basic induction procedure
- TLT gains Second Life building and scripting experience
- KUMC develops new learning technique
- Students learn operating room layout (unintended)
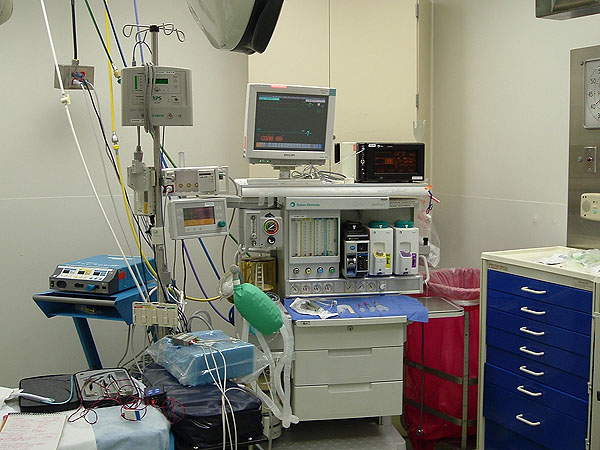
Real Operating Room
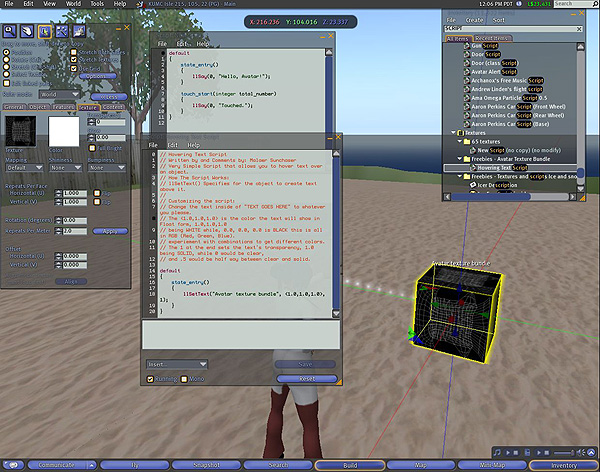
Building & Scripting in Second Life
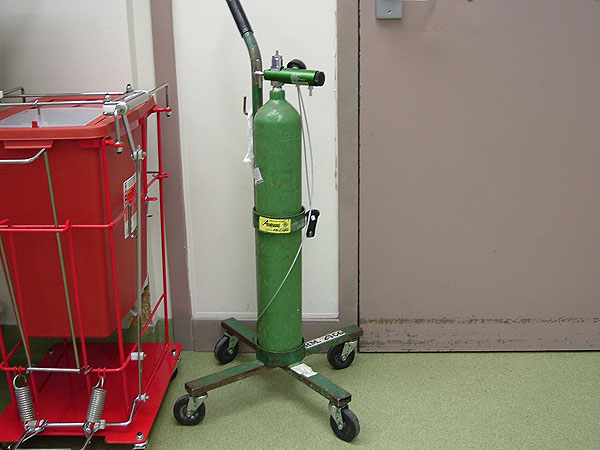
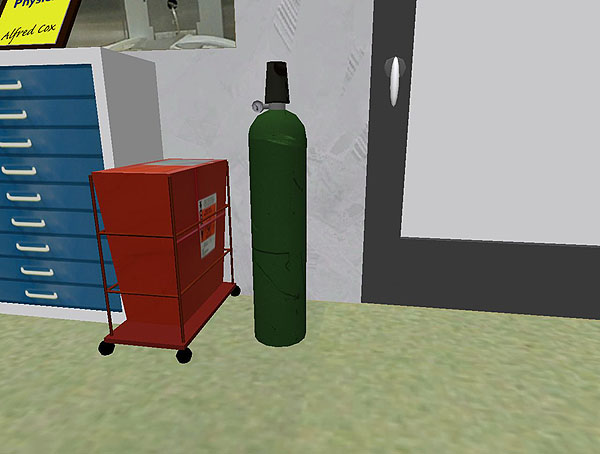
Real Operating Room and Second Life Operating Room
The objectives for this project included giving students a space to learn the basic induction procedure before stepping foot in the real-life operating room, giving the Teaching and Learning Technology’s staff experience in building and scripting in Second Life, and providing the university as a whole with a new learning technique. After the project began development, an unintended objective was also found to be extremely helpful to the students.
Audio & Transcript: About the Unintended Objective
You are missing some Flash content that should appear here! Perhaps your browser cannot display it, or maybe it did not initialize correctly.
Everyone involved with this project was very excited to be able to provide the students an opportunity to practice the induction procedure before stepping foot into the real operating room. This was a way for each student to use a computer, log into Second Life, and walk through the procedure, and even make mistakes that they could not do previously.
As part of the technology staff, we were excited to be able to learn scripting and building in Second Life, which gave us a fun game-like experience when working. We did have previous programming experience, which really helped a lot in learning the Linden Scripting language.
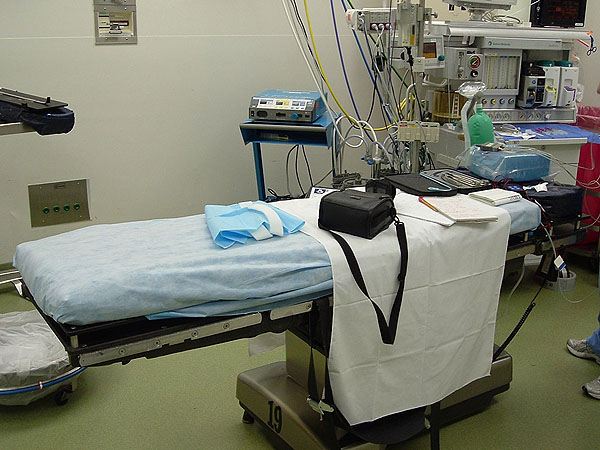
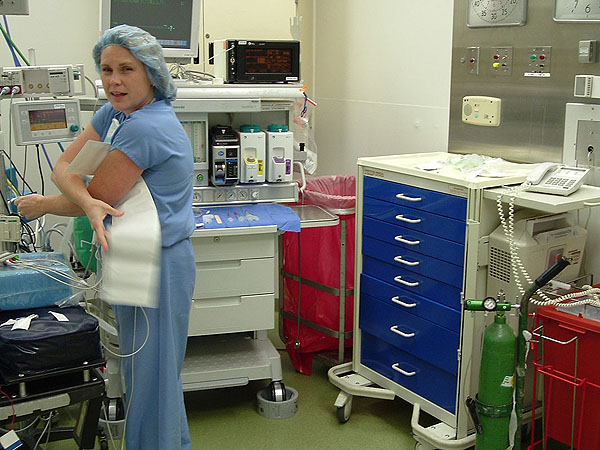
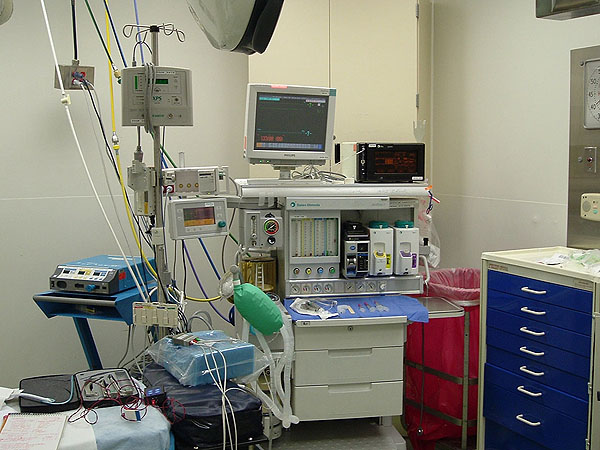
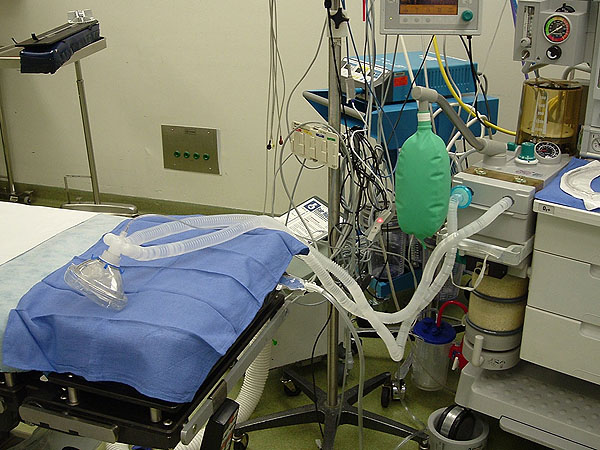
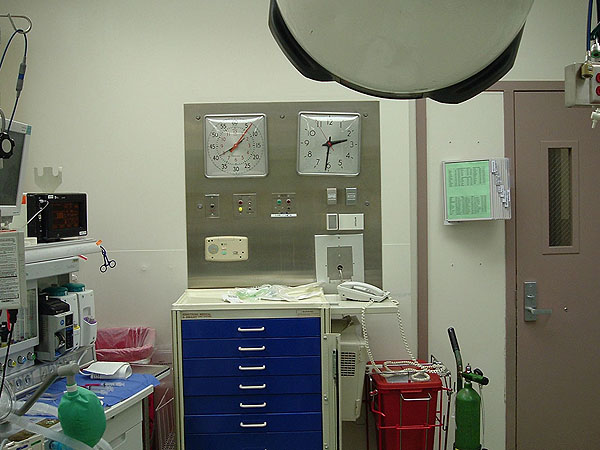
While there were many exciting objectives for this project, there was one unintended objective which was realized by both the technology staff and faculty. The Second Life operating room was created to look exactly like the operating room at KU Medical Center. The clocks and the tables and the other objects were placed in the same locations as they are in the real operating room. This created the ability for students to have exposure to the layout of the operating room before they first step into the real operating room. The faculty were very excited to be able to expose their first-year students to what they would see when they were ready for the real-life operating room.
Why Use Second Life?
- Low cost
- Rapid development
- Secure space
The low cost of developing in Second Life was one reason it was decided to use this type of environment for the simulation. A Second Life account is free, but there were some other costs to using Second Life, including the time and hours it takes to develop the simulation, as well as the cost of uploading images.
Since the Second Life environment is already created, building the simulation is a rapid process. TLT only needed to focus on the objects, without too much focus on the platform and software needed to develop a 3D environment from scratch.
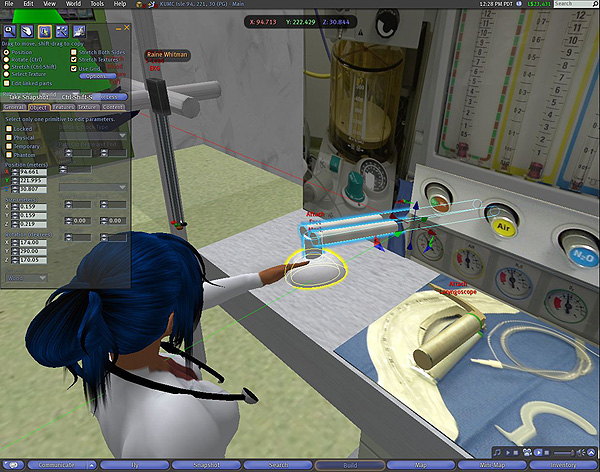
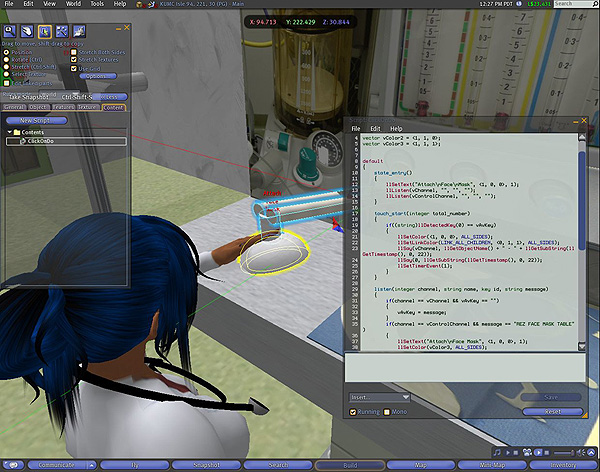
Building and Scripting Objects (Face Mask)
Video of Building in Second Life
Video Transcript: Building in Second Life
Building in Second Life begins with shapes like a cube, ball, or cylinder. Any user can right-click to bring up the pie menu and choose Create. After choosing the object type you want to work with, and clicking where you want to place it, you have an object. You can edit many settings for each object to make it change. Anyone can easily learn how to create an object in Second Life. Being a builder involves some creativity in learning how to connect these different types of objects together to make what you want, then adding textures or images over the object’s sides to give it the look you want.
Another reason Second Life was chosen for this project was the ability for the university to have a secure space of their own. An island was purchased, and access to the island is available only to students, faculty, and staff of the med center. This provided KUMC with a secure place to have content without grievers or other random avatars getting in the way of learning in the space.
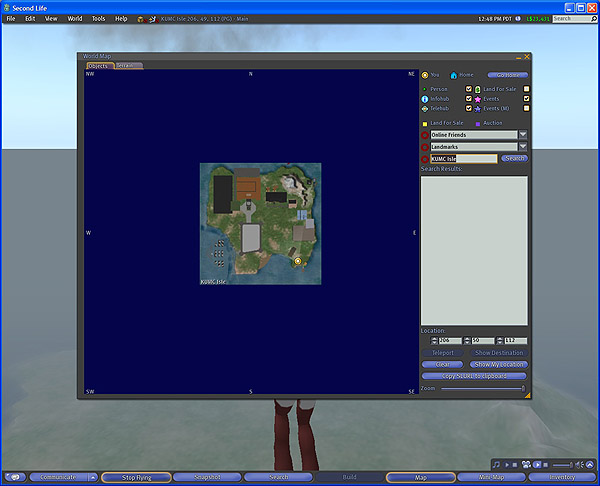
KUMC Isle
See also “Educators Choose to Build Virtual Worlds” at
http://secondlifegrid.net/slfe/business-virtual-world.
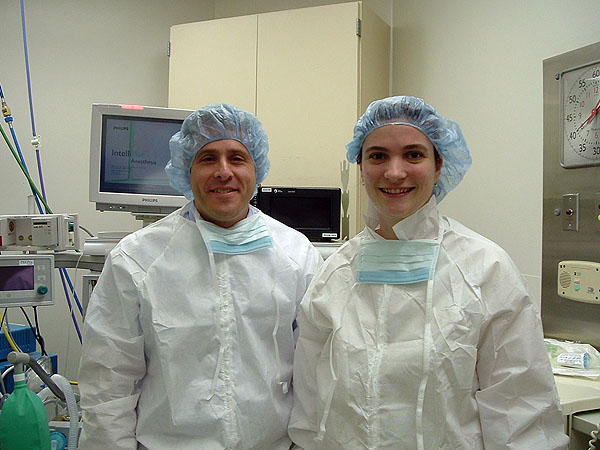
Dave and Stephanie Scrub In
- Worked through induction procedure
- Photographed objects
- Photographed for textures
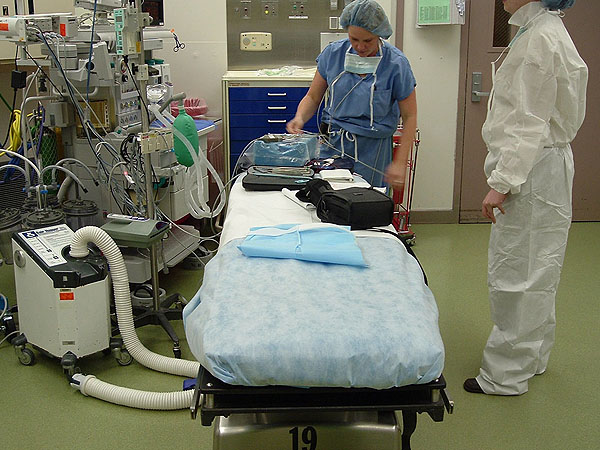
One of the first steps was for the TLT members to get acquainted with the operating room that they were supposed to replicate in Second Life, along with gaining the knowledge of just what this induction procedure was about. So, we — Dave Antonacci and Stephanie Gerald — put on scrubs and walked into the operating room.
While in the operating room, we were walked step-by-step through the induction procedure and took pictures of every object with a digital camera. We had to understand the procedure, understand the functions and names of the equipment, and know how each object was supposed to work in the correct order of the procedure. We took pictures of the walls, the objects on the walls, the floor, the objects on the floor, and even pictures of the power outlets in order to place these into Second Life as textures over the objects to create a photorealistic semblance.
The Real Operating Room
Audio & Transcript: Stephanie Describing Her Experience in the OR
You are missing some Flash content that should appear here! Perhaps your browser cannot display it, or maybe it did not initialize correctly.
Before we could walk into the operating room, we had to outfit ourselves in scrubs, which can be an exciting experience for someone who has never worn scrubs before. We were covered from top to bottom, from our paper hat that covered our hair, to the paper shoes that covered our shoes. I’m sure Karri, the Nurse Anesthetist faculty member who walked us through the procedure in the operating room, was amused by our excitement.
We used one of the rooms that was, at that time, not being used, but were told that if the room was needed, we had to leave immediately. Karri walked us through the procedure step by step as we tediously took notes and drawings on our notebooks. It was interesting how Karri knew the procedure so well from doing it every day, that it was difficult for her to slow it down and describe every step and the name of every single object for us. I understood, because it reminded me of what it’s like when I have to show someone how to use software when they have very little or no computer experience. We took pictures of everything from the walls to the little wires attached to every instrument used in the process. I was humbled by what these medical professionals do before each surgery, and was intimidated as to how we were going to accomplish this in Second Life.
Induction Procedure
After a couple of hours of walking through the procedure in the real operating room with a faculty member, we had a rough draft of the induction procedure. Now we had to translate the procedure into how it could work in Second Life.
The following video shows scrolling through the documentation of the induction procedure, with voice audio of some of the steps. You can see what a long process it is and the stages the documentation has been through.
Video of Induction Procedure Documentation
(View this Prezi presentation at http://prezi.com/16843/.)
Video Transcript: Induction Procedure Documentation
We started with our drawings and notes containing the steps within steps of the procedure and began to visualize which steps could be a problem in the Second Life environment. We created a general list of 22 steps, without all the details so it wasn’t as daunting. Then, there was a list of just the needed objects to be created. Finally, there was a list of the detailed steps next to the steps that the simulation would do. For example, in the real operating room, an anesthetist would pick up the blood pressure cuff and put it on the patient. This is a very tactile step, but in the Second Life operating room, the blood pressure cuff would be on the table and then would be clicked and then shown on the patient. The side-by-side list was very helpful when meeting with the faculty, because the faculty understood one side of the list and we, the technology staff, understood the other side. This made it easier to look at the different problems and solutions that had to be discussed to determine if the student would be able to know what was going on in the Second Life operating room, and could be clearly compared to what was expected in the real-life operating room.
Problems and Solutions
- Buy, modify, or build objects
- Level of realism and functionality
- Visual cues
- Life-sized objects too small for Second Life
- Feedback to the user
- Performance evaluation
- Multiuser environment
- Busy faculty and students
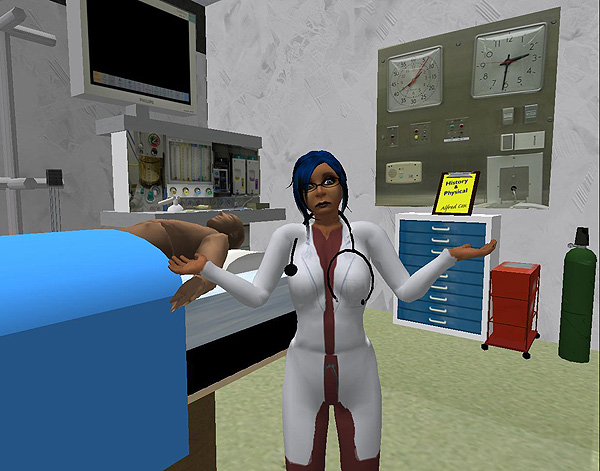
We faced many problems when initially mapping out how the simulation would work: should we buy, modify, or build the objects, for example, and what level of realism and functionality could we accomplish in Second Life? We had to think about the visual cues, the size of objects, any feedback, and how to evaluate what a student has done in the simulation. Since Second Life is a multiuser environment, we also looked at whether the presence of other avatars would be a problem. We also had to deal with the busy schedules of faculty, staff, and students.
Audio & Transcript: The Solutions
You are missing some Flash content that should appear here! Perhaps your browser cannot display it, or maybe it did not initialize correctly.
We found many solutions to our problems. Initially, we thought we could buy objects in Second Life that had already been created by other builders, and then modify them for our operating room. This proved to be a difficult task simply because there were not many builders selling any type of medical equipment at that time. The very few items we did find were not as realistic as we wanted, and we were not able to modify them. So, we made the decision to create our own objects. That way, we would have complete control over every object.
Another concern was the amount of realism and functionality we could do compared to what the faculty were expecting in the simulation. We had to answer very difficult questions like, “Is clicking on an object going to be construed by the student correctly?” or “How real and/or detailed do we need these objects to be?” We did determine that the more real an object was made in Second Life meant we had to put that much more time in to build it. Some objects were created with a simple box and a picture laid over it, and we thought that was enough for the student to know what that object was supposed to be. Other objects we spent much more time constructing to make them look like their real-life counterparts.
We didn’t realize it at first, but the size of objects also became a problem. Building objects with equal dimensions to the real-life objects made them too small to click on. They were lost easily, so we had to make every object overly large so they could be seen easier.
Another problem was how the student was going to know what they were doing. For example, we had to determine what type of feedback was needed to give the students enough knowledge to know they had actually given the patient drugs, or whether they clicked on the wrong drug when they meant to click on a different drug. We were also concerned with providing them with too much feedback, where they felt overwhelmed, or if the feedback was too much of a distraction and maybe interrupted the simulation too much.
Initially, we thought the technology members would be able to check the results of the simulations with a correct simulation and give the student immediate feedback if they had correctly clicked on the objects in the correct order. But after speaking with our faculty, this would not be the case. Because of the many steps, there are also many different ways in which the order could be correct. So, we decided that the instructor would have to evaluate each simulation session for correctness. This is why the instructor is e-mailed each result.
Since Second Life is a multiuser environment, we had to form a plan in case another student’s avatar walked into the operating room and started messing with the current student playing the simulation. This was accomplished with the main controller, which adds the avatar’s name in a variable and is passed on to all the other objects for verification. This way, only the student who started the simulation will be the avatar each object will accept.
The final problem that we came across was that both faculty and students in the nurse anesthesia department had extremely busy schedules. The faculty of this department both teach and are on call at the hospital, as well as working on their PhDs, so it was difficult to have constant meetings for updates and any additional information or feedback that we needed from the faculty.
Five Object Types
Main Controller
There needs to be one object that controls the overall simulation. There are many reasons for this. One reason is so there is a way to begin and end the simulation without any interruptions from other avatars. This object is also responsible for talking to every other object in the simulation so that each object knows which avatar started it and accepts commands from only that avatar. This way, if someone else happens to walk in and start clicking on the operating room objects, they will not disrupt the current simulation session. Finally, the main controller records and sends the results of the simulation session to an email address.
Primary Object (Face Mask)
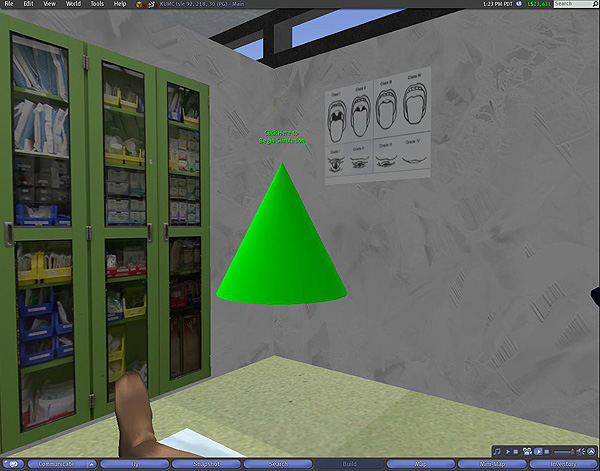
The primary objects are placed in their starting positions. For example, the face mask would start on the table, so the primary face mask object is seen when the student first walks into the room. Text placed above each primary object indicates it is clickable. For example, the face mask in this example would have the words “Attach Face Mask” above the image so that the student will know that when clicked, the face mask will attach to the patient.
Secondary Object (Face Mask on Patient)
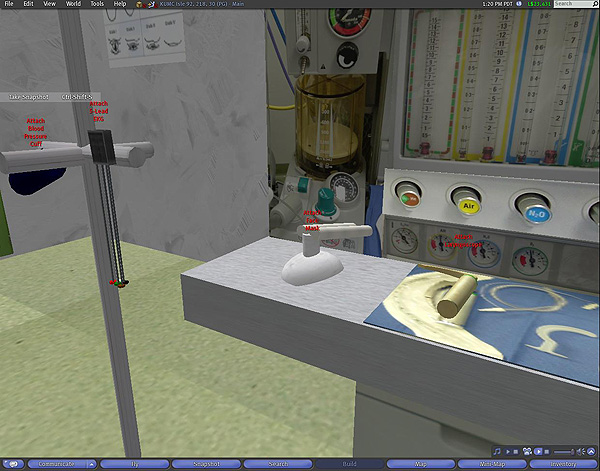
Secondary objects are initially hidden and attached to the patient. In our example of the face mask, there would be a second, hidden, face mask already on the patient. After the student clicks the primary instance of the face mask, that object would disappear while the secondary object would appear on the patient, giving the student the illusion that they have placed the face mask on the patient. Primary and secondary objects also talk to each other so that the other instance knows when it needs to appear or hide. Additionally, after the secondary object appears, text above it appears that says “Detach Face Mask.” When this is clicked, the primary object appears again and the secondary object disappears.
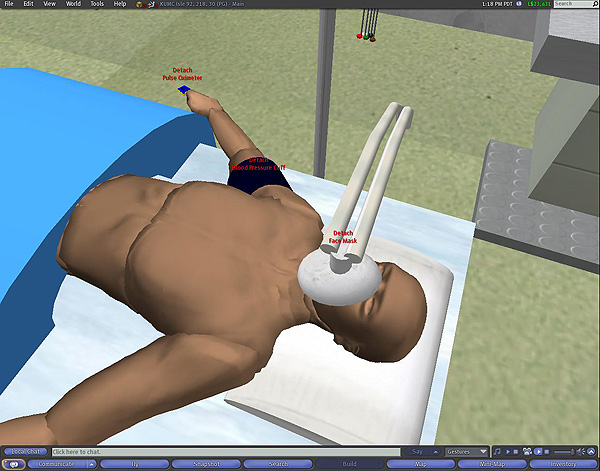
Tertiary Object (Computer Screen)
The tertiary objects respond after the secondary objects appear. These tertiary objects give additional feedback to the student based on what the real-life objects do in the operating room. For example, when the pulse oximeter is attached to the patient, the computer screen displays a pulse line and beats per second.
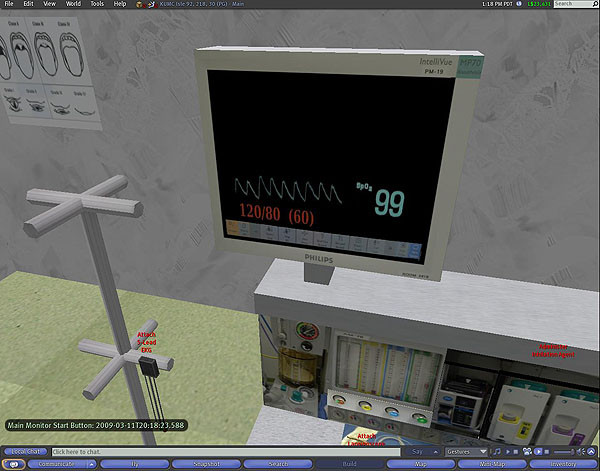
Background Objects
Finally, objects like clocks on the wall or a syringe trashcan were built into the space. The student does not directly interact with these objects; they are purely in the background to give the student a sense of other equipment that might be in the operating room. These objects are not a part of the simulation, but provide the students with an overall knowledge of the operating room environment.
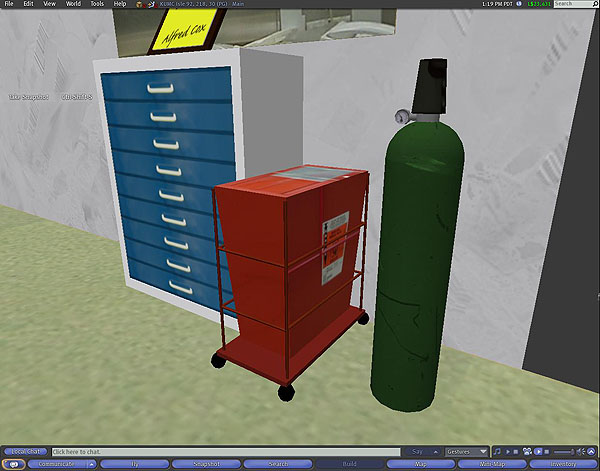
Demonstration of Simulation
The Nurse Anesthesia Operating Room Simulation is located on KUMC Isle in Second Life. To view how the objects interact with each other, look at the video tutorial of some of the objects in the Second Life Operating Room.
Video Tutorial on Simulation Objects
Since a procedure like this could be done correctly in many different ways, faculty are e-mailed the steps each student took after the student has completed the simulation.
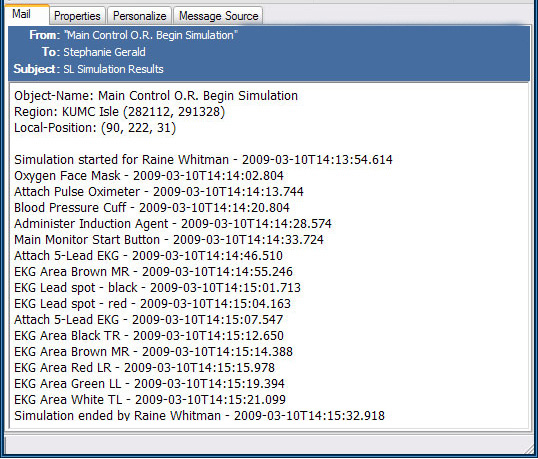
Sample E-Mail of Student Results
Video Transcript: Tutorial on Simulation Objects
Here we are in the hospital on KUMC Isle. Through this door is the Nurse Anesthesia Operating Room. As the student enters, he or she can walk around the room to see where each object is located. The student can click on the patient’s history and physical by clicking on the clipboard on these shelves. In the real-life operating room, the nurses and doctors are able to view the patient information from this clipboard, which is usually in this location. So, the student clicks on this clipboard to get the patient information notecard.
Now that the student knows what the patient needs surgery for, they will be able to perform the pre-op procedure for that specific problem. This is when they will begin the simulation. Here you can see the main controller; when the student is ready to begin, they will click this object. You will notice two things happen here: The main controller will turn red and the text above the object will change from “Click here to begin” to “Click here when finished,” and the student will get a text prompt that they have begun the simulation. The controller has communicated on a private channel to all other objects that the simulation has started. Now each object will respond to the student. All the primary objects are seen at this point. The student will click on the first object they think should be attached first. There are 22 steps in the process, and five different ways a step can proceed.
The first type of object step will simply attach to the patient without additional responses needed from the student. For example, the face mask, when clicked, will disappear, and the secondary object of the face mask will appear on the patient. The student gets a text response telling them and the main controller what has been clicked.
The second type of object process, like the induction agent, will provide the student with a text response. So, when I click on the object, you can see I get the text response so they know they have administered the agent to the patient.
The third type of object process, like the pulse oximeter, are attached to the patient, and a tertiary object reacts; in this case the computer screen starts to display the pulse line and beats number. So, I will click on the oximeter, and you see the change to the screen.
The fourth type of object process uses tertiary objects that need a response from the student. Objects like the blood pressure cuff, the student will click on the cuff to attach to the patient, but then the student should look at the screen and see the blood pressure is not displaying. The student will need to remember to click the start button on the screen to see the blood pressure. So, if I click the start button, we see the blood pressure numbers display.
Finally, some object processes are more complicated, like the EKG lead. In this case, after the lead is clicked, the student will get a question, and they will provide a choice. So, when I click on the EKG lead, you see I get a question of “Which color EKG lead do you want to attach?” so the student will attach each colored lead to the correct spot. If the student chooses brown, they will see the patient now has gray spots to click where the brown lead is supposed to be placed. A text response is communicated; in this case, it’s telling me that the brown EKG lead was placed on the MR (or Middle Right) side of the chest. This tells the instructor where the student placed each lead. The student will then place the other leads on the patient by going back to the EKG lead box and selecting which lead they want to place.
After the student has completed the simulation, they will click the main controller, which turns yellow while it processes and sends the e-mail of recorded steps by the student to the faculty.
Pilot Testing
![]()
- Four male students
- Two juniors and two seniors
- Three gamers and one non-gamer (junior)
- Used existing Second Life accounts
- Brief Second Life training (10 minutes)
- Tested first eight steps of induction procedure
- Observation and protocol analysis (think aloud)
- Findings
- Move and view training was important.
- Small target objects were not prohibitive.
- Transparent objects still blocked clicks.
- Simulated functionality was not always clear.
- All four participants were enthusiastic about the positive educational potential.
This simulation has been pilot tested with a small group of Nurse Anesthesia students to get their input about usability, authenticity, and educational value. These students were provided with a ten-minute orientation to Second Life, using preexisting avatars and focusing only on needed Second Life skills to perform the simulation. Although a few usability issues were identified and subsequently addressed, all students who piloted this simulation thought it was very realistic and were enthusiastic about it helping future students learn the induction procedure.
Audio & Transcript: About the Pilot Test
You are missing some Flash content that should appear here! Perhaps your browser cannot display it, or maybe it did not initialize correctly.
Because the Nurse Anesthesia program begins each summer, the operating room simulation has not yet been used by entry-level students. However, this simulation has been pilot tested with a small group of Nurse Anesthesia students. These students were already experienced with the basic induction process, and their input about usability, authenticity, and educational value was sought. The pilot group consisted of four male students: two juniors and two seniors. Three of the four students were experienced gamers, with one junior student a non-gamer. Unlike some Second Life orientation training sessions, which attempt to teach students about all things Second Life, only about ten minutes of Second Life training was provided to this pilot group to prepare then for the testing session. This group used preexisting avatars, so no training time was spent creating accounts or customizing avatars, and training was also limited to only Second Life features needed for this simulation: moving, focusing, and interacting with objects. The University of Kansas Medical Center has used this approach to Second Life training for other projects as well. By limiting student training to needed capabilities, student time can stay focused on learning course content, and not so much on learning the virtual world technology itself.
After orientation training, students were shown a brief demonstration of the first eight steps of the induction process simulation, and then each student was moved to a private testing room and asked to perform the induction simulation while thinking aloud and with two Teaching & Learning Technologies staff members as observers. These pilot students had little difficulty moving their avatars within the operating room itself, nor did they encounter problems focusing and clicking on equipment objects, even objects which were fairly small, like the pulse oximeter. However, the simulated functionality of the operating room equipment was not always clear, and transparent objects sometimes obstructed user interaction with other objects in the simulation.
All students who piloted this simulation thought it was very realistic, and they were enthusiastic about it helping future students learn the induction procedure.
Application of Learning Technique
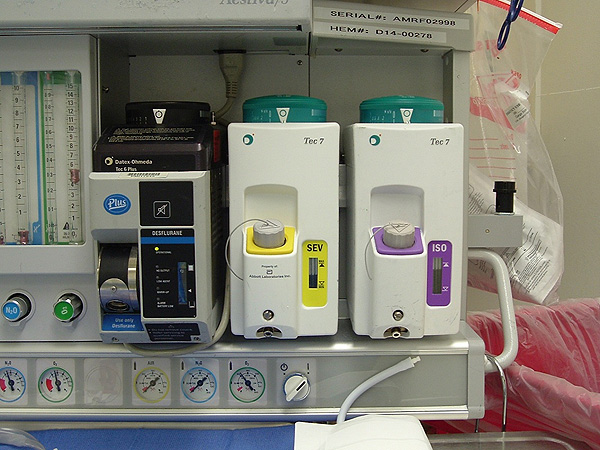
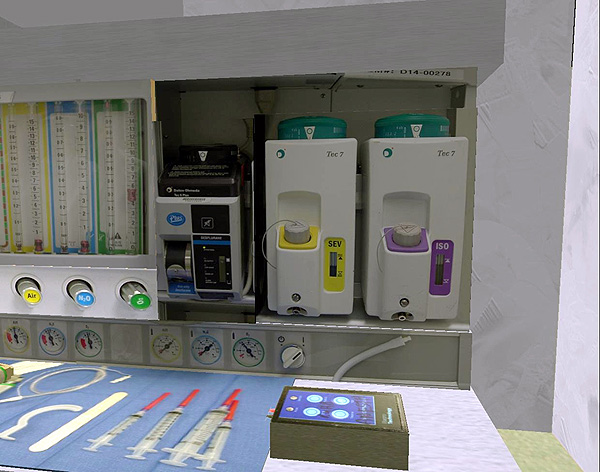
Induction Agent Dispenser (Real and Second Life)
This simulation illustrates how students can effectively learn a complex physical procedure, such as the induction process, in a virtual world learning space. By separating the executive routine from the detailed how-to instructions of each major procedural step and possible variations, cognitive load is reduced. This virtual world learning technique can be used in other fields where complex physical procedures are taught, such as assembly of equipment, calibration of instruments, and emergency response.
Audio & Transcript: Learning Complex Physical
Procedures in a Virtual World Learning Space
You are missing some Flash content that should appear here! Perhaps your browser cannot display it, or maybe it did not initialize correctly.
One goal for this project was to explore the design, development, and effectiveness of a virtual world learning space for learning complex physical procedures like the induction process. Although this virtual world simulation does not provide practice with the physical how-to aspects of induction, it does allow students to learn the steps in a very complex procedure and thereby reduces cognitive load for learning other aspects of the procedure. In other words, students master the executive routine using the virtual world simulation, allowing them to concentrate more when learning how to physically handle the patient and equipment. Additionally, virtual world learning spaces can be accessed anytime, anywhere, and however often students might want. Because complex physical procedures are taught in many areas both in healthcare and other fields, this instructional technique may be useful for other learning tasks, such as assembly of equipment, calibration of instruments, and emergency response.
Conclusion
Training students in the physical space of the operating room was expensive for the Nurse Anesthesia department. They needed a more flexible space for students to learn a complicated process. The Second Life simulation provided the department with a virtual learning space having many interacting objects and without the constraints of a physical space. Furthermore, students could easily access the virtual space without permission or a standing appointment, giving them more flexibility.
The Nurse Anesthesia simulation gave students the opportunity to focus on the steps and the process before learning the tactile use of objects in the basic induction process, which they would learn in the physical operating room. Using Second Life gave us the opportunity to develop a virtual leaning space based on the educational needs of the Nurse Anesthesia department, instead of modifying their needs to fit inside another physical learning space.
- New Media Consortium. The Horizon Report: 2007 Edition (Austin, TX: New Media Consortium, 2007), http://www.nmc.org/pdf/2007_Horizon_Report.pdf.
- Linden Lab, Second Life Educators List [Electronic list archive] (San Francisco, CA: Linden Lab, 2009), https://lists.secondlife.com/cgi-bin/mailman/listinfo/educators.
- Nancy Jennings and Chris Collins, “Virtual or Virtually U: Educational Institutions in Second Life,” International Journal of Social Sciences, vol. 2, no. 3 (2007), pp. 180–187, http://www.waset.org/ijss/v2/v2-3-28.pdf.
- Malcolm Brown, “Learning Spaces,” in Educating the Net Generation, Diana G. Oblinger and James L. Oblinger, Eds. (Boulder, CO: EDUCAUSE, 2005), pp. 12.1–12.22, http://www.educause.edu/ir/library/pdf/pub7101.pdf.
© 2009 Stephanie Gerald and David M. Antonacci. The text of this article is licensed under the Creative Commons Attribution-Noncommercial-No Derivative Works 3.0.

